Save project's changes with Git and Github

Introduction
After having created a Strapi content-type successfully in the previous post, let's pin an important point of the workflow before digging deeper: saving the Strapi project's changes. We've already talked about the Git and Github development workflow before. And in this post, we'll make it directly in practice within our JAM-stack project.
The plan
The JAM-stack in its simplest form is composed of at least two repos (unless you are using a monorepo): The front-end repo and the back-end which is the CMS itslef. We are going to apply Git in both of these repos for our project ubsin two differnet methods: first by the CLI in the terminal and then using VS Code as a Git GUI.
Using Git to save a project from the terminal (In the Strapi repo)
Init the repo
First, open a terminal session in the folder containing our Strapi code. If you followed this series from the beginnig, the folder's name used is strapi-admin.
cd /path/to/your/stapi/project
What we have done so far since the creation of this strapi app is just the creation of a content-type for a collection of posts. You see, Strpi's setup wizard provide you with all the necessary files to run without hassle but does not initialize the repository with Git. To do so run the following command:
git init
Check the status of the git repo:
git status
That command outputs which files and folders are new, modified or has been deleted fro the current repository. In our case this is the output:
On branch main

No commits yet

Untracked files:
  (use "git add <file>..." to include in what will be committed)
        .editorconfig
        .env.example
        .gitignore
        README.md
        config/
        database/
        favicon.png
        package.json
        public/
        src/
        tsconfig.json
        yarn.lock

nothing added to commit but untracked files present (use "git add" to track)
Make a first commit
Since the repo was just recently initialized with Git, all the records in this output are considered new and Untracked files. To start tracking them with Git, run the following command:
git add . # stage everything without distinction
That command will stage every new and modified files inside the current repo. But if you wanted to only stage a specific file or a subset of files you can pass the complete path to that file or a glob pattern as argument to the git add command.
Now create a commit of the staged changes. As a simple analogy, Git commmits are like saving checkpoints when you are playing a video game. If you ever do a wrong move in the next phase you can always rewind and come back to that checkpoint. To create Git commit here is the command to run:
git commit -m 'first commit' # or any other meaningful message
If you check the status of the repo now, you'll see that the the diff tree has been cleaned:
# output of git status after commit
On branch main
nothing to commit, working tree clean
Create a dev branch and make some changes
To demonstrate the git worklow we've talked about earlier, we first need to create a Git branch resposinble for carrying all the development changes so we don't directly affect the main branch if something breaks. The following commands are those needed to cmplete that, the first one is for creating a neww branch and the later for changing into the newly created branch:
git branch dev # dev is the name of the new branch
git checkout dev # change the current branch to dev
Now we need some changes to the current project. For that, you can create an random file anywhere in the repo, or create a new content-type, or modify an existing one from the Strapi admin panel. Here in the current I chose to create a category content-type just to show you how you are actually affecting the Strapi project's folder structure when you're playing with the Admin UI. We've already covered how to do that in hte previous article so head over it to follow-up with us.
Once a content-type created, in my case the Category type with a name field and a relation field to the Post type, this is what we'll see if we check the repo's status (git status):
# output of git status
On branch dev
Changes not staged for commit:
  (use "git add <file>..." to update what will be committed)
  (use "git restore <file>..." to discard changes in working directory)
        modified:   src/api/post/content-types/post/schema.json

Untracked files:
  (use "git add <file>..." to include in what will be committed)
        src/api/category/

no changes added to commit (use "git add" and/or "git commit -a")
As you can see, There were new files created in src/api/category/ folder and the file src/api/post/content-types/post/schema.json which was already exinsting before the changes has been modified. In fact every-time we manipulates the content-types from the amin UI, Strapi will reflect the changes directly on the file system. Those changes need to be kept track of with Git for a sustainable project.
Save the changes on dev branch and merge into main
Logically we have to save these changes so stage them then creat a commit, it is the same process as we've done in our first commit in the earlier section above.
git add .
git commit -m 'created a Category content-type'
At this point, the newly added feature is okay, and we want to pass the development phase and mark it as stable by merging it into the main branch. So these are the commands to follow to do so:
git checkout main
git merge dev
What we've done above is, moved or changed into the branch that we want to receive the merge (in our case the branch main) then merge the dev branch itno it.
Push the repository to Github
Github allows us to save our entire repository in a remote location or server. The advantage is that i can serve as a backup if by any chance our local repository is compromised (If our PC caught a problem for example). But not only it is an awesome platform which empowers teams to work together on their project.
To start using github for saving a repository you need to have an account and then create a Github repository. I suggest you to follow this guide to do so, but remember to keep the remote repository empty so that we can push our local one into it later.
Once a remote repository created, the following commands will do the task of pushing our loca repository into it:
git remote add origin <url-to-your-remote-repository>
git push origin main
with these two commands above we have added a repository named origin and gave it the url of our Github repository then pushed the local repository int that remote (origin). Now if you go back into github and refresh your repo's page you'll see the exact same folder structure as on local PC that have been saved into Github.
Using VS Code as Git GUI to save a project (In the front-end repo)
GUI or graphical user interfaces were created to ease up our life in everyday's tasks and Git did not escape the need for developers of dedicated GUI. In particular, VS Code editor has a very decent Git integration. In addition to the built-in Git extension, I advice installing the Gitlens extension too: the free version is largely enough for us.
In contrast to the previous section, I ask you to start by creating a remote repository in Github. Then, go to the directory containing our front-end code (It's a SvelteKit app if you remember), and open it in VS Code.
Init the repo
Initializing a Git repo in VS Code is very easy, you just need to open the source control panel and if the folder is not yet a Git repository, a button with the test "Initialize repository" at the top-left will let you do so.
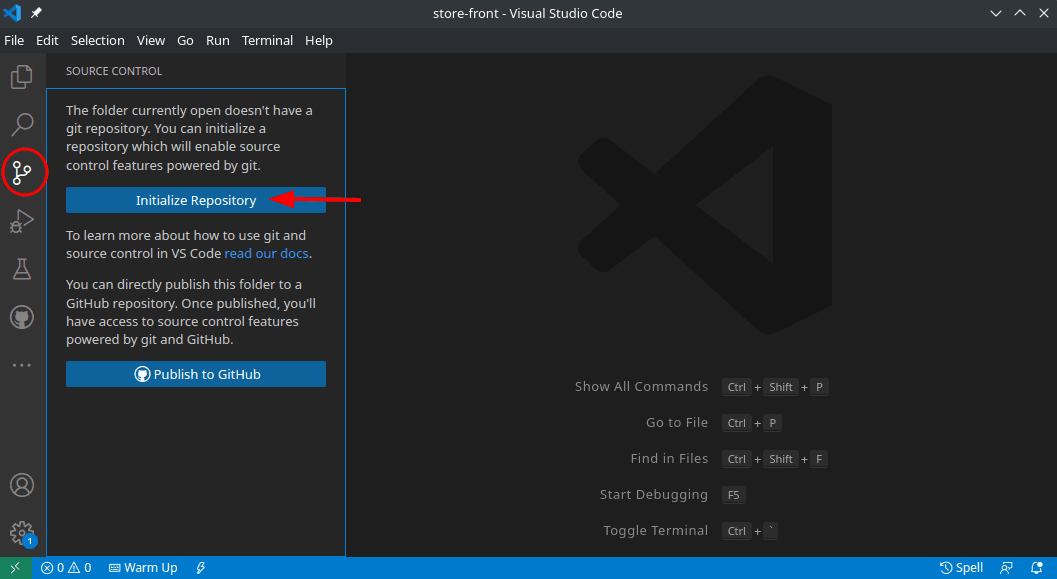
You can Immediately see after that the list of untracked or modified files, also called the source tree under source control > changes. This list is the equivalent to the command git status we've seen in the CLI section above. For now these are all new files because we just initialized the folder with Git.
Create a commit
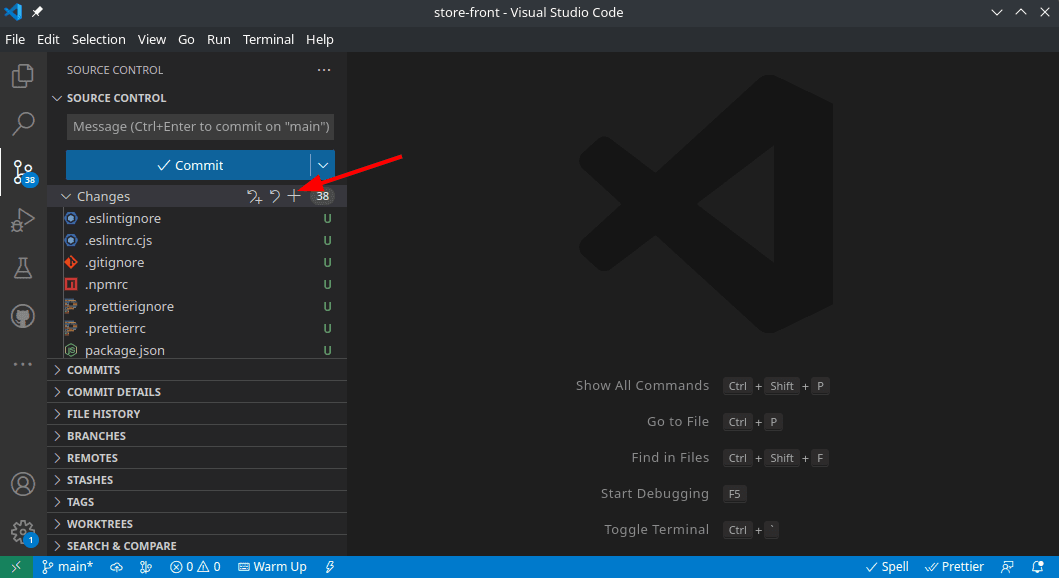
Before we can commit any changes in Git we have to stage these changes first. Hover on top of the changes list and click on the + (plus) icon next to it to stages all changes once. Otherwise, you can stage individidual file or only a subset of files by selecting the ones you need.
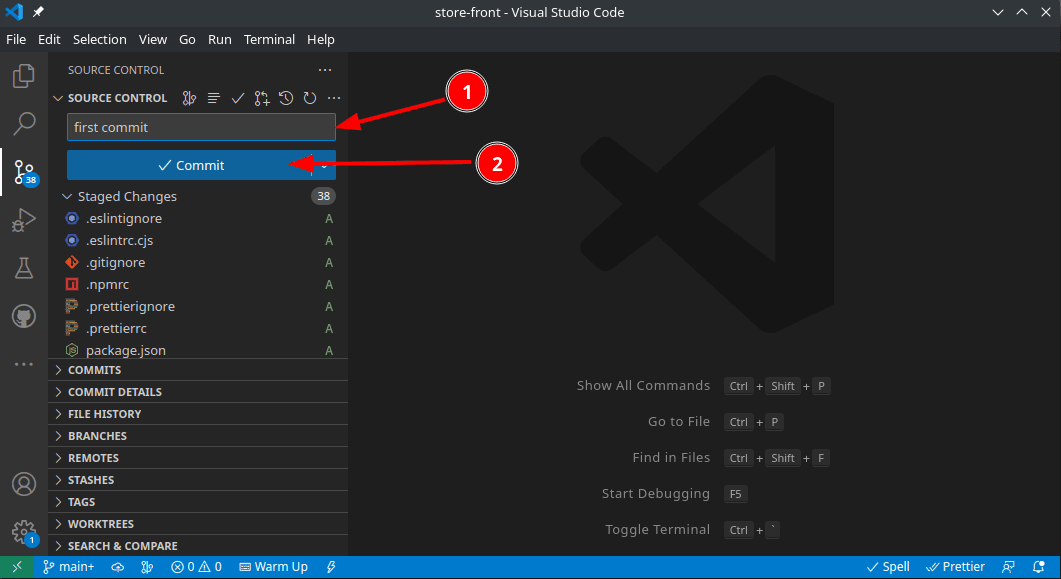
Once staged create a commit message, in the input field at the top of hte panel, then click on commit:
Create a dev branch
Always in the same optic of in the precedent section where we used the CLI, we also need a dev branch here. To creat ea new branch, click on the branch name on the bottom-left of th window (the bleow image will help you find it), select 'create new branch', name your branch (in our case the name is 'dev') then press enter.
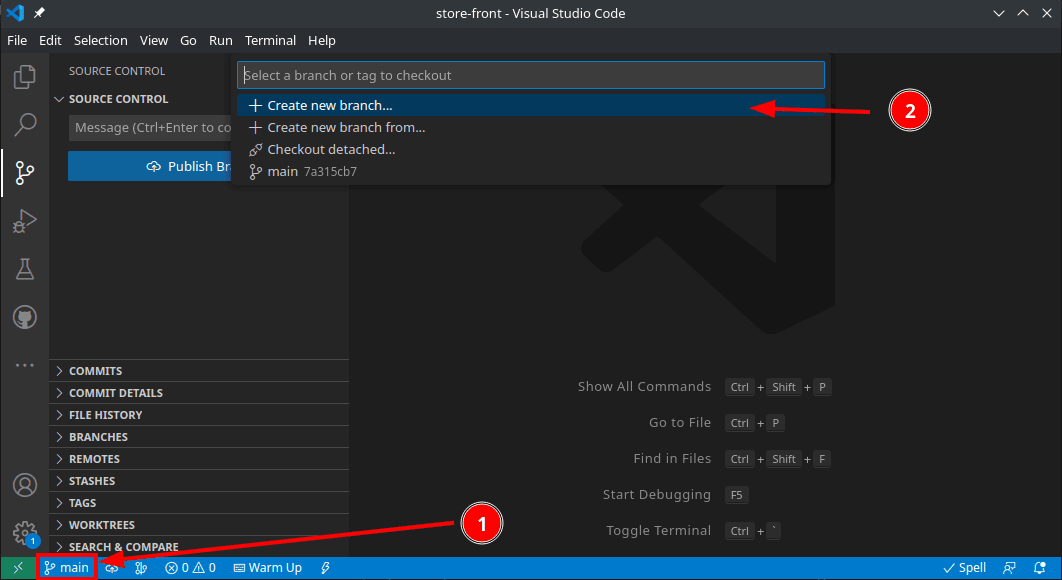
If you check the branch name at the bottom-left of the window, you can see that it changed to the newly created branch i.e 'dev'. VS Code automatically checkout new branches for us.
Merging dev branch into main branch
For figurative purpose only, let's create a temp.ts file inside the src folder. Then, as usual, stage these changes and create a commit. Remember, that we are currently in the dev branch.
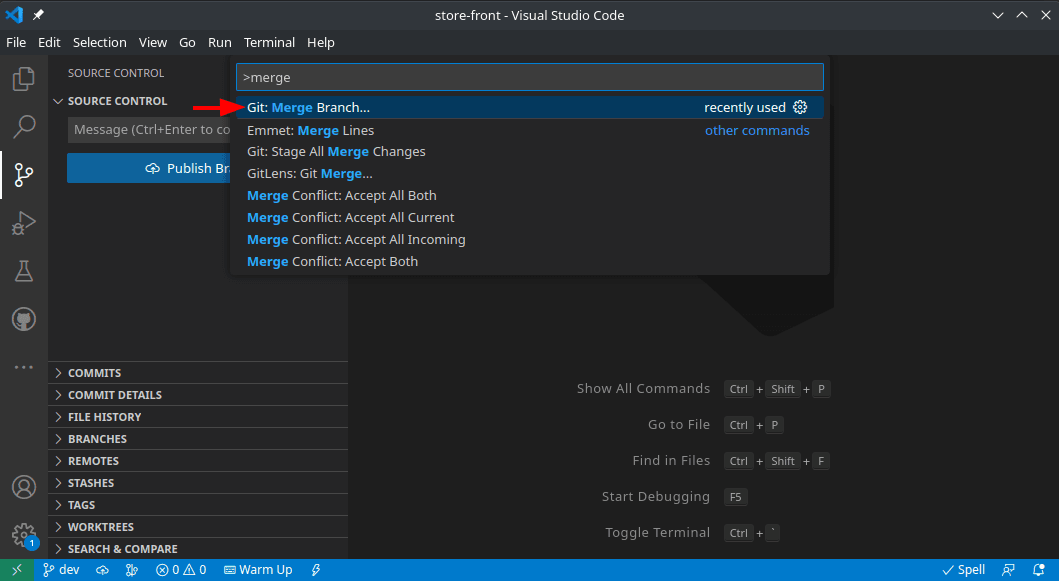
For merging barenches we should firs switch into th receiving branch i.e. into main. After that open the command palette with Ctrl + Shift + P keyboard shortcut then search and select 'Merge Branch'. Choose from the list, the branch to merge from, i.e. dev.
Push to Github
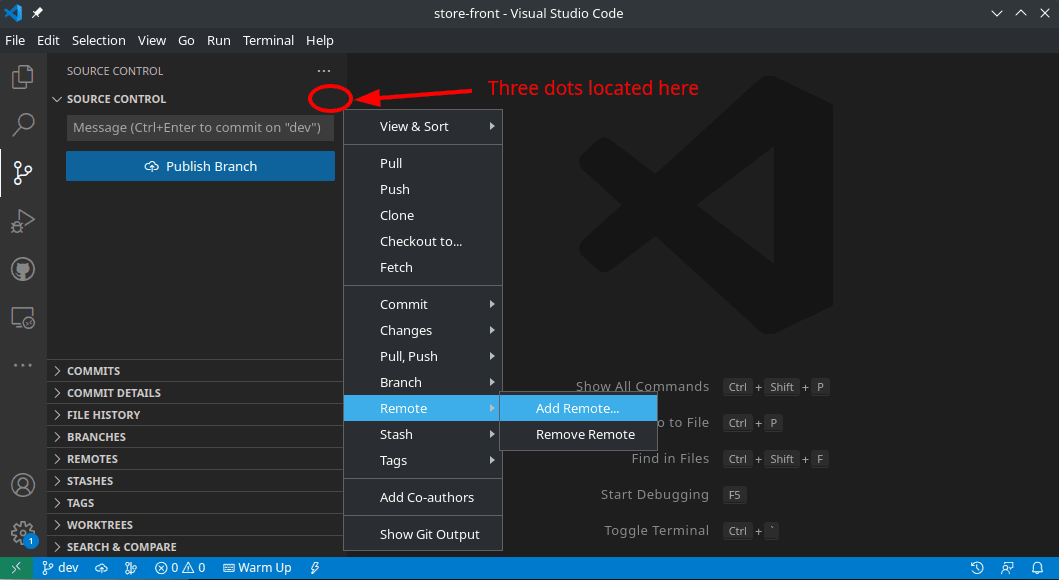
Befor actually being able to publish or push anything on Github wehave to set a remote for our local repository. To do so, In the source control panel, click on the three dots next to 'source control' then selet Remote > Add Remote in the context menu.
A propmt will show up, fill the it with the url of the empty Github repository we created earlier.
Now you can finally click on the 'Publish Branch' button without any issues to push the current baranch into Github.
Bottom words
We have successfully practiced the Git workflow, from both the command line and using VS Code as GUI. By using VS Code we drastically stripped down the difficulty of managing a git project. However, I think that knowing the basics of the CLI is essential before jumping into a full-fledged GUI otherwise you can be lost.
PS : We've seen how to use VS Code for doing Git here but there's also many other alternatives. I use Gittyup on Linux and for Windows users Sourcetree is the best pick in my opinion.